
I recently posted a new video of AteBitVJ up onto Vimeo. It’s an interesting one because it shows how a single, pretty basic effect can be made into something much more by applying a few layers of effects. I’m a big believer that you can really easily improve your real-time visual effects by applying some simple post-processing, and I thought it might be nice to delve behind the scenes into how I go about doing that.
So, first off, here’s the video:
It’s recorded live from AteBitVJ with FRAPS in a single take – no external post-processing or editing involved. Unfortunately the video compression hasn’t been particularly kind here and you can see some ugly compression artifacts. Luckily, the screen shots in this post will be lossless! The audio is provided by 4mat and is called “Spun Gold”. It’s one of my favourite tracks from his 2012 album, Origins.
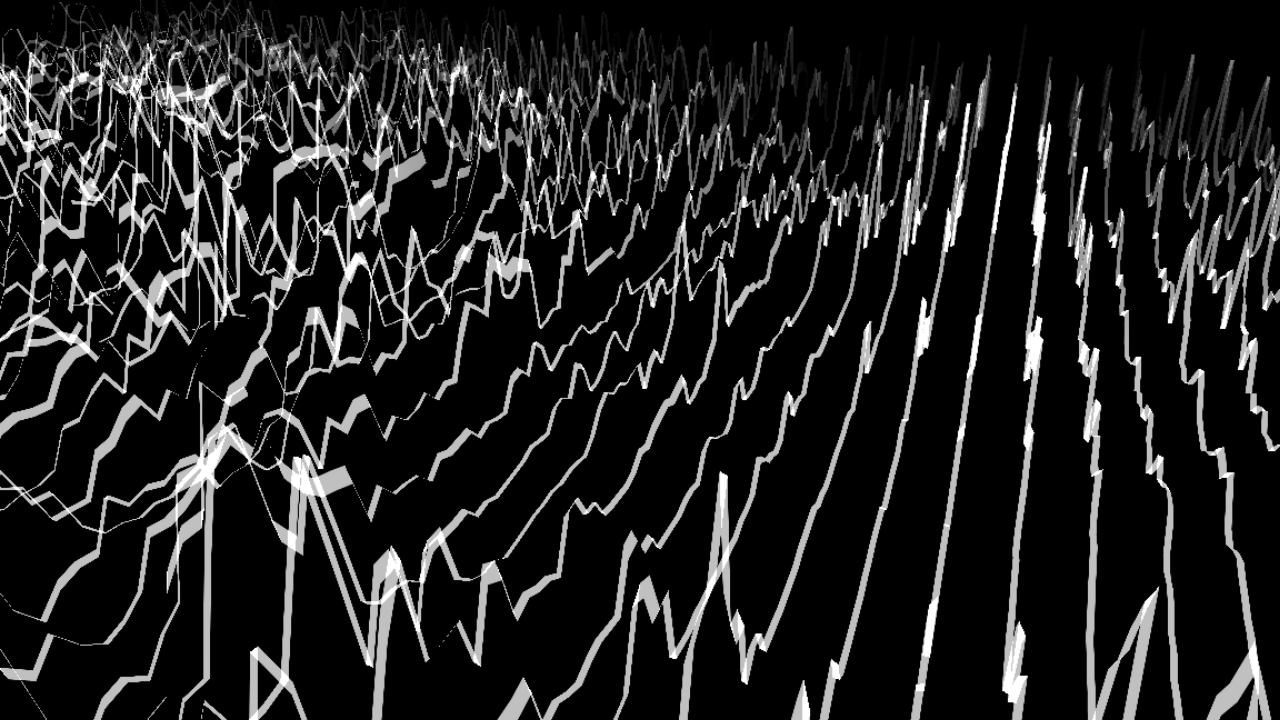
The base layer for this video is a pretty simple effect – audio FFT data from the track represented as an infinitely scrolling 3D landscape. By itself this effect can look quite nice, but I wanted to get some more out of it. I started out by zooming in and cropping so that it fills most of the frame:
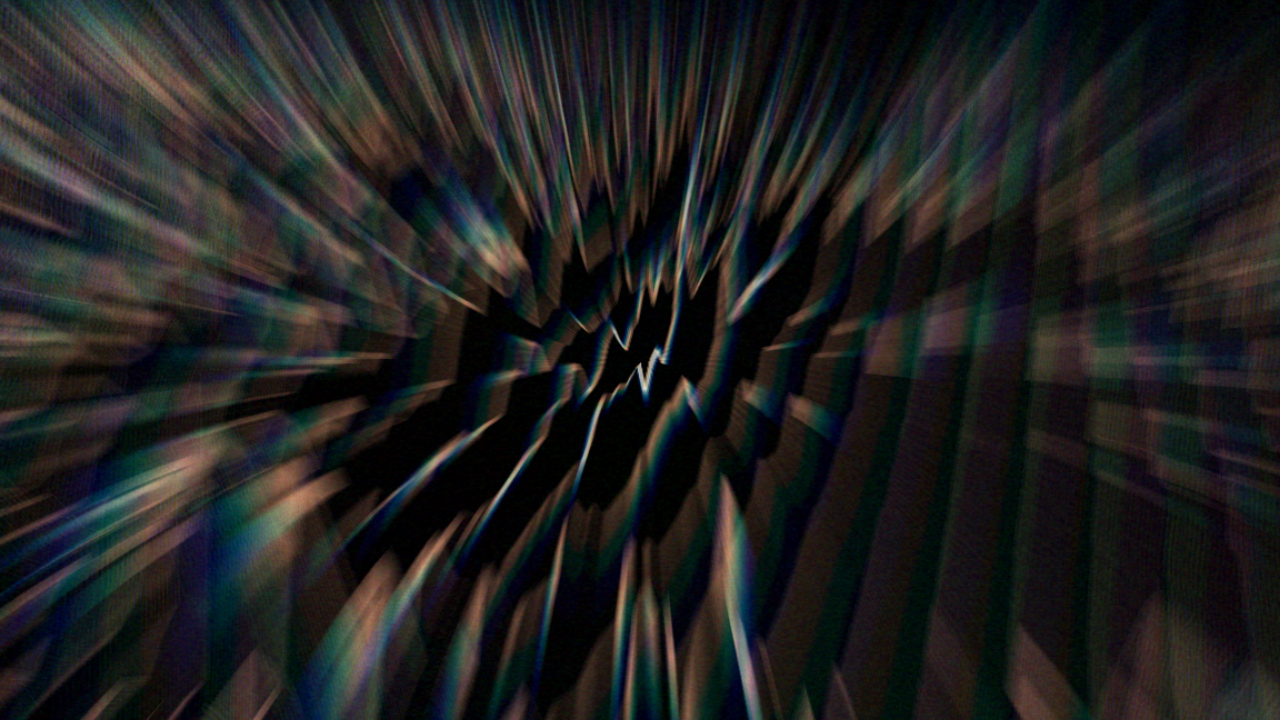
Next I apply the first effect: a radial blur. This takes the image and blurs it away from the centre point. There’s an extra little trick here in that I blur the red, green and blue elements by slightly different amounts. This gives a quick and dirty chromatic aberration effect. All the cool kids are doing it:

Now comes a very light layer of noise. It’s pretty hard to see here but you can notice it’s effect all the way down to the subtle grain that’s visible in the final image. Noise is probably one of the most underrated effects – adding small doses of it in the right places can really help break up sharp edges and gradients and that can make computer generated images look less synthetic:
Then comes a standard bloom effect. After this is applied we pretty much have the basics of the final look done:
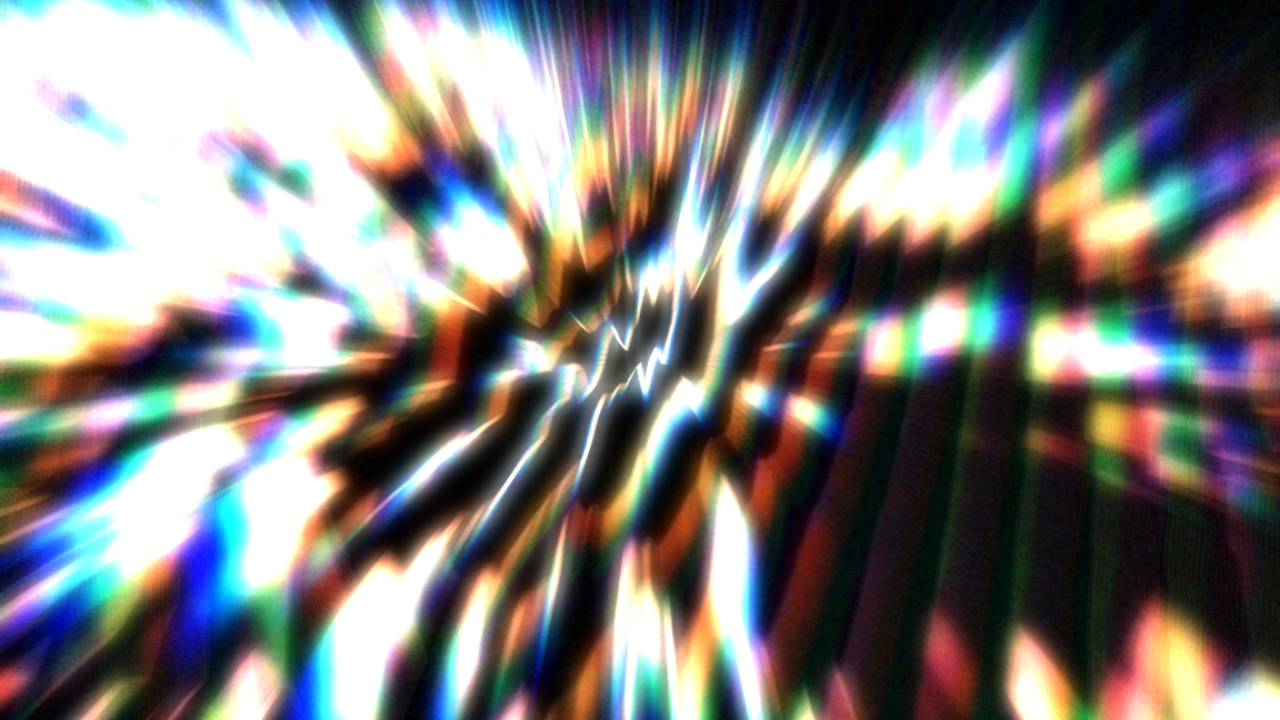
Bloom is followed by overlaying a vertical colour gradient. This makes the image a bit more interesting by varying the colours from the top to bottom. From here on in it’s just a case of tweaking the colours to get the final result:

(for reference, the gradient is here)
After the gradient I add some colour correction. This is the biggest contributor to the overall colour palette of the image. It works by sampling the colours of the source image and using these as an index into a pre-computed 1D look up table to get the destination colour. The look up texture was made in Photoshop where I loaded up a suitable test image and then played with the levels until I get the look that I wanted. In this case that means a soft, retro looking colour with strong blue tones at the darker end of the scale and creamy whites towards the top. Once I’d got that look I applied it to a linear black to white gradient and saved it as my 256×1 look up texture. This is a really simple, really lightweight but really powerful technique to give your images a stunning colour palette and it’s somewhat akin to colour grading in the film and cg industries. There’s a good discussion of this technique (and the more advanced 3D look up texture version) in GPU Gems 2. The result:

(the look up texture is here)
That all looks good so far, but we’ve lost a bit of definition in the process so I put that back in with some brightness and contrast adjustments:

And last, but by no means least, I add a vignette effect over the top. It’s simple and fairly subtle, but it frames the image nicely:

Finally, here’s a composite image of how all the different layers add up to give the end result:
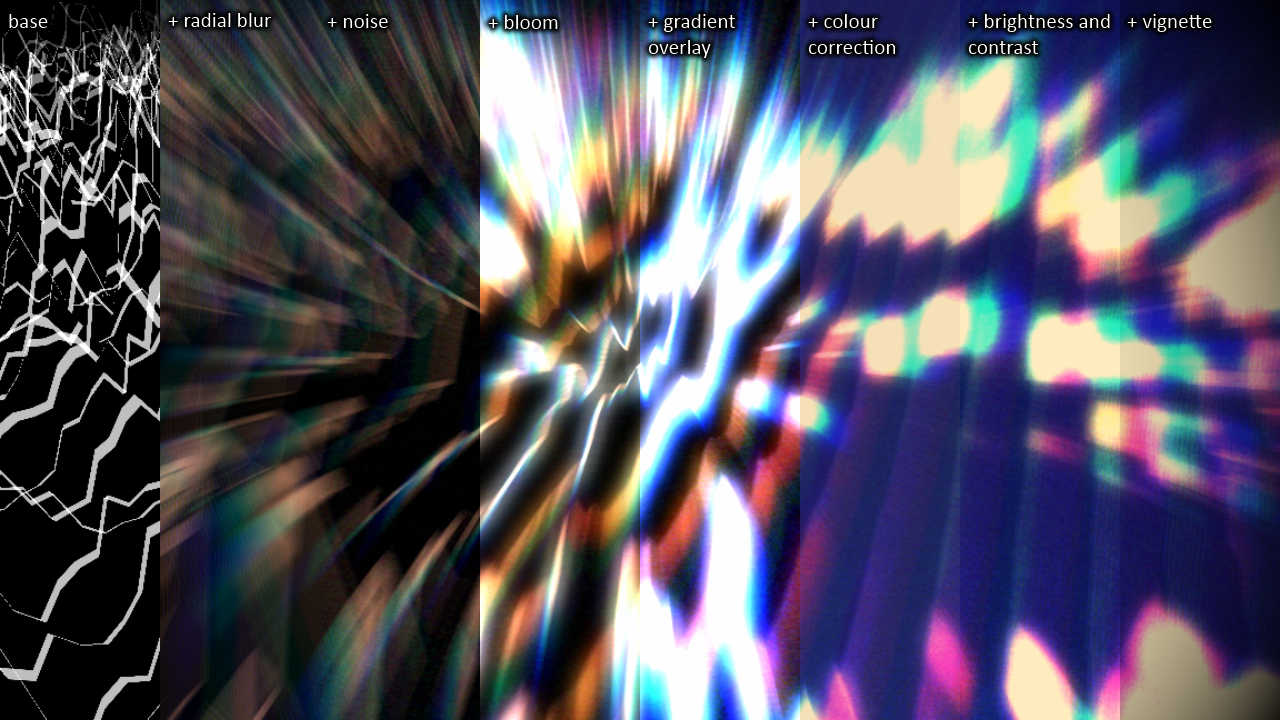
So there you go – one simple base effect and then a bunch of small, generic adjustment layers to push and pull it into something more interesting. And with AteBitVJ this is all happening real-time at 60fps. In fact, one of the nicest parts of the whole process was that I was able to create, preview and tweak the whole effect completely live. If you’re writing your own real-time visual framework then not only would I strongly encourage you to add the ability to layer up effects like this, but you should also make everything editable in real-time. Immediate feedback when editing is definitely a very important thing and, once you’re used to it, you won’t want to give it up.


Hello Paul,
where’s your AteBit project at? It seems like the first thing in terms of live generative VJ software that makes sense to me – if I get it right it runs natively in Python?
I have resorted to developing an own environment based on PyGame, just because I want to run my own simulations natively in a python script, and on Linux. I didn’t find this capability in any VJ software (well, they are pretty much non-existent on the Linux platform).
Now, pygame is heavily out-dated, doing anything OpenGL will require that I learn all the basic functions, and it doesn’t have built-in shading, effects, audio detection (I am currently feeding MIDI signals over from pure data, urgh).
So, my impression of AteBit is that it should be fantastic to use – only that currently you are keeping a lid on it :-( Will it run on Linux? Any release date in sight? In any case, I would be curious to know more!
Keep up the good work, it’s looking great!
Lennart
Hi Lennart.. thanks for the comment!
AteBitVJ is currently “in development” and it’s not ready for release yet. It’s very stable and has been used live a couple of times, but it’s just not feature-complete. I’ve already given it out to a few people for Alpha testing and I’m happy to give it out to anyone who can give it a proper go ;)
It runs on Windows using DirectX so a port to Linux (or Mac) is not likely in the near future unfortunately. It’s written in C++ and Python is really only there as a way to allow people to write their own modules. I’m starting to use Python more and more for writing new modules though, and the support is getting better and better.
Thanks in turn for the response Paul.
Mh, maybe time to start that dual boot business again, if this runs only on Windows. Linux seems to just not cut it for live performance software-wise…
If you can write your own python modules in it, that means you can also import pretty much any python libraries you want? From the few impressions I got of modul8, it seemed impossible to write proper code in it, just very limited scripts interfacing with the “API” that it provides, and library import wasn’t even mentioned in their tutorials. Didn’t really get me too interested…I need the ability to import classes, numeric libraries etc.
Well, I would definitely be up for testing, but currently at loss for a Windows machine. Snap. If I do redecide, I will come knocking again ;-)
Great use of this beautiful 4mat track into your demo ;)